Cleaning or replacing hearing aid wax guards is super important because wax buildup can block sound and even damage the hearing aid receiver. Here’s a simple step-by-step guide for you:
🧼 How to Clean or Replace Hearing Aid Wax Guards
🛠️ What You Need:
- New wax guard kit (usually comes with small sticks or “tools”)
- Soft cloth or tissue
- Your hearing aid (with the earpiece removed if necessary)
✨ Step-by-Step Instructions
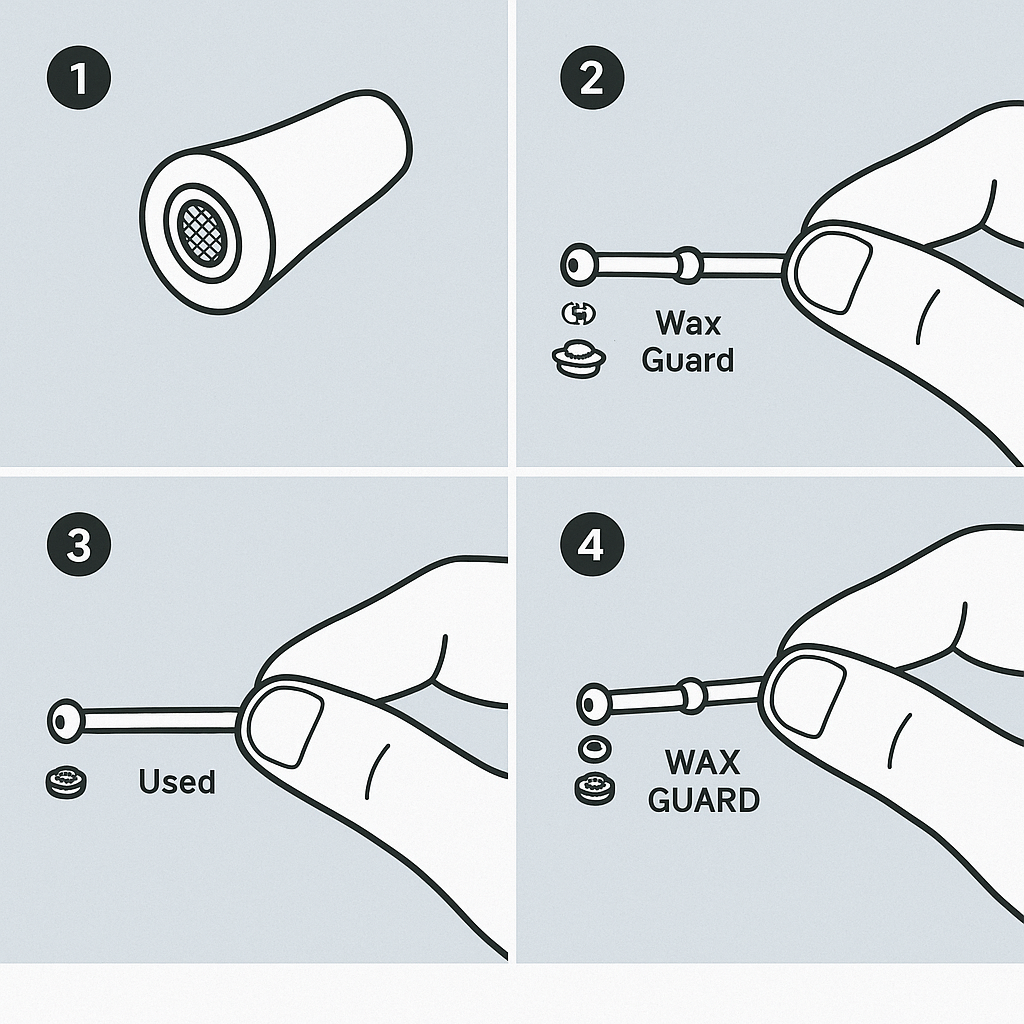
- Identify the wax guard:
- It’s the tiny white or clear filter inside the tip of the receiver (the part that goes in your ear).
- Remove the old wax guard:
- Take a wax guard tool (it usually has two ends: one to remove, one to install).
- Use the empty side (removal side) to push into the center of the old wax guard.
- Gently pull it straight out—it should come out attached to the tool.
- Insert the new wax guard:
- Flip the tool around to the new wax guard side (it has a fresh guard already attached).
- Push the new wax guard into the hole where the old one was.
- Gently pull the tool straight out—the new guard stays in place.
- Check your work:
- Make sure the new wax guard is sitting flat and secure inside the receiver.
- Wipe the outside gently with a soft cloth if needed.
🧠 Helpful Tips:
- Change the wax guard about once a month, or sooner if you notice:
- Muffled sound
- No sound at all
- Visible wax clogging the guard
- Be gentle—never force the tool in too hard.
- Always keep a few extra wax guards handy, especially if you travel.
- Use clean hands to avoid introducing moisture or oils.
🔍 Signs You May Need to Change the Wax Guard:
- Volume is much lower than usual
- You hear crackling sounds
- The hearing aid keeps shutting off
- You see obvious wax in the guard
Here is the diagram you requested: